扫码一下
查看教程更方便
在本文中,你将了解 photoimage() 方法以及如何在 Tkinter 中使用它。Tkinter 在 Python 程序员中非常流行,因为它可以让你用 Python 做一些有趣的事情。
你可以使用此方法将图片添加到按钮、标签或画布。它使应用程序更具交互性、美观性和实用性。
PhotoImage 只能显示组件支持的图像。如果它们不能显示在组件上,它将返回错误。
显示图像的一般组件是标签、按钮和画布。
我们需要安装 Pillow 模块以使用 PhotoImage() 方法,因此使用此命令安装此模块。
pip install Pillow
from tkinter import *
from PIL import ImageTk,Image
# CreateTK object
gui = Tk()
# Create canvas object
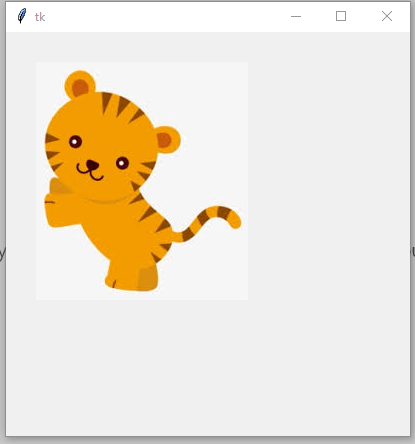
cnv = Canvas(gui, width = 400, height =400)
cnv.pack()
# create an object of PhotoImage
photo = ImageTk.PhotoImage(Image.open("lion.png"))
cnv.create_image(30, 30, anchor=NW, image=photo)
gui.mainloop()
我们将 ImageTk 和 Image 类导入此代码。ImageTk 类有几个方法;一种是帮助显示图像的 PhotoImage() 方法。
我们使用了 Image 类中的 open() 方法。open() 方法包含你要显示的文件路径,并接受多种格式,如 jpg、png、gif 等。
在这种情况下,canvas 组件用于显示图像;在下一个示例中,我们将使用 Label 组件来显示图像。
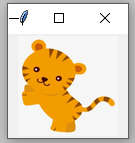
有时我们需要在 GUI 中调整图像的大小;幸运的是,Tkinter 提供了帮助调整图像大小的 resize() 方法。
from tkinter import *
from PIL import Image,ImageTk
gui= Tk()

width =100
height =100
photo= Image.open("lion.png")
photo= photo.resize((width, height),Image.ANTIALIAS)
# create an object of PhotoImage
photoImg = ImageTk.PhotoImage(photo)
photo_label= Label(gui, image=photoImg)
photo_label.pack()
gui.mainloop()
当我们使用 resize() 方法时,我们不能直接在 PhotoImage() 中传递图像,因为在 PhotoImage() 方法中传递图像后我们将无法使用 resize() 方法。 resize() 方法有两个参数,宽度和高度。
调整大小的图像已通过此代码的 PhotoImage() 方法。Label 组件使用图像属性显示图像。
在此代码中,你将学习如何使用 Tkinter 中的缩放功能。
ZoomIn() 函数有助于放大图像。zoom_in 变量限制创建图像对象,直到第二次执行。
img1 = img1._PhotoImage__photo.zoom(max_num)
由于我们使用的是全局图像对象,因此我们通过 zoom_in 变量设置 if 条件。_PhotoImage__photo.zoom() 方法有助于放大图像;此方法需要一个整数。
我们在这个方法中传递了 max_num 变量;当 ZoomIn() 函数调用时,此变量将加 1。
让我们演示一下 ZoomOut() 函数,该函数的工作原理与 ZoomIn() 函数相同。
img2 = img2._PhotoImage__photo.subsample(min_num)
_PhotoImage__photo.subsample() 方法使其不同于 ZoomIn() 函数。
这种方法有助于缩小图像;该方法采用整数。简而言之,当 ZoomOut() 函数调用图像时,它会被缩小。
from tkinter import *
from PIL import Image as PIL_image, ImageTk as PIL_imagetk

window =Tk()
zoom_in=1
zoom_out=1
max_num=1
min_num=1
def ZoomIn():
    global img1
    global img2
    global zoom_in
    global max_num
    # A condition which will let create image object in second execution
    if zoom_in > 1:
        img1 = PIL_imagetk.PhotoImage(file='lion.png')
    max_num += 1
    if max_num <3:
        img1 = img1._PhotoImage__photo.zoom(max_num)
        label.config(image=img1)
    else:
        img1 = img1._PhotoImage__photo.zoom(3)
        label.config(image=img1)
        max_num=1

    img2 = PIL_imagetk.PhotoImage(file='lion.png')
    zoom_in+=1


def ZoomOut():
    global img2
    global img1
    global zoom_out
    global min_num
    # A condition which will let create image object in second execution
    if zoom_out > 1:
        img2 = PIL_imagetk.PhotoImage(file='lion.png')
    min_num += 1
    if min_num<3:
        img2 = img2._PhotoImage__photo.subsample(min_num)
        label.config(image=img2)
    else:
        img2 = img2._PhotoImage__photo.subsample(3)
        label.config(image=img2)
        min_num=1

    img1 = PIL_imagetk.PhotoImage(file='lion.png')
    zoom_out+=1


img1 = PIL_imagetk.PhotoImage(file='lion.png')

img2 = PIL_imagetk.PhotoImage(file='lion.png')
label =Label(window, image=img1)
label.pack()

btn=Button(window,text='zoom in',command=ZoomIn)
btn.pack()

btn2=Button(window,text='zoom out',command=ZoomOut)
btn2.pack()
window.mainloop()
输出结果: