Spring Boot 跟踪微服务日志
如果发生任何问题,大多数开发人员都会面临追踪日志的困难。 这可以通过 Spring Cloud Sleuth 和用于 Spring Boot 应用程序的 ZipKin 服务器来解决。
Spring Cloud Sleuth
Spring cloud Sleuth 日志使用以下格式打印
[application-name,traceid,spanid,zipkin-export]
- Application-name : 应用程序的名称
- Traceid : 调用同一个服务或一个服务到另一个服务时,每个请求和响应的 traceid 都是相同的。
- Spanid : Span Id 与 Trace Id 一起打印。 Span Id 是不同的每个请求和响应调用一个服务到另一个服务。
- Zipkin-export : 默认为假。 如果为真,日志将被导出到 Zipkin 服务器。
现在,在构建配置文件中添加 Spring Cloud Starter Sleuth 依赖项,如下所示
Maven 用户可以在您的 pom.xml 文件中添加以下依赖项
<dependency>
   <groupId>org.springframework.cloud</groupId>
   <artifactId>spring-cloud-starter-sleuth</artifactId>
</dependency>
Gradle 用户可以在 build.gradle 文件中添加以下依赖项
compile('org.springframework.cloud:spring-cloud-starter-sleuth')
现在,将日志添加到 Spring Boot 应用程序 Rest Controller 类文件中,如下所示
package com.jiyik.sleuthapp;

import org.springframework.boot.SpringApplication;
import org.springframework.boot.autoconfigure.SpringBootApplication;
import org.springframework.web.bind.annotation.RequestMapping;
import org.springframework.web.bind.annotation.RestController;

import java.util.logging.Level;
import java.util.logging.Logger;

@SpringBootApplication
@RestController
public class SleuthappAopplication {
    private static final Logger LOG = Logger.getLogger(SleuthappAopplication.class.getName());
    public static void main(String[] args) {
        SpringApplication.run(SleuthappAopplication.class, args);
    }

    @RequestMapping("/")
    public String index() {
        LOG.log(Level.INFO, "Index Api 正在被访问");
        return "欢迎访问 Sleuth!";
    }
}
现在,在 application.properties 文件中添加应用程序名称,如图所示
spring.application.name = tracinglogs
现在,我们可以创建一个可执行的 JAR 文件,并使用以下 Maven 或 Gradle 命令运行 Spring Boot 应用程序。
对于 Maven,使用下面给出的命令
$ mvn clean install
成功之后,我们可以在 target 目录下找到 JAR 文件。
对于 Gradle,使用下面给出的命令
$ gradle clean build
这里我们使用 IDEA 来启动服务(读者也可以使用上面两种方式中的一种生成可执行 jar 包)
现在,应用程序已在 Tomcat 端口 8080 上启动。

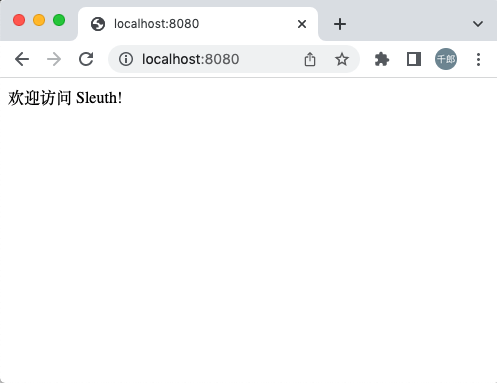
现在,在 Web 浏览器中访问 URL 并在控制台日志中查看输出。
http://localhost:8080/

我们可以在控制台窗口中看到以下日志。 观察日志以以下格式打印 [application-name, traceid, spanid, zipkin-export] 。

Zipkin 服务
Zipkin 是一个监控和管理 Spring Boot 应用程序的 Spring Cloud Sleuth 日志的应用程序。 要构建 Zipkin 服务器,我们需要在构建配置文件中添加 Zipkin UI 和 Zipkin Server 依赖项。
Maven 用户可以在 pom.xml 文件中添加以下依赖项
<dependency>
   <groupId>io.zipkin.java</groupId>
   <artifactId>zipkin-server</artifactId>
</dependency>
<dependency>
   <groupId>io.zipkin.java</groupId>
   <artifactId>zipkin-autoconfigure-ui</artifactId>
</dependency>
Gradle 用户可以在 build.gradle 文件中添加以下依赖项
compile('io.zipkin.java:zipkin-autoconfigure-ui')
compile('io.zipkin.java:zipkin-server')
现在,在应用程序属性文件中配置 server.port = 9411。
对于属性文件用户,在 application.properties 文件中添加以下属性。
server.port = 9411
对于 YAML 用户,在 **application.yml **文件中添加以下属性。
server:
   port: 9411
在主 Spring Boot 应用程序类文件中添加 @EnableZipkinServer 注解。 @EnableZipkinServer 注解用于使我们的应用程序充当 Zipkin 服务器。
package com.jiyik.zipkinapp;

import org.springframework.boot.SpringApplication;
import org.springframework.boot.autoconfigure.SpringBootApplication;
import zipkin.server.EnableZipkinServer;

/**
 * @author jiyik.com
 */
@SpringBootApplication
@EnableZipkinServer
public class ZipkinappApplication {
    public static void main(String[] args) {
        SpringApplication.run(ZipkinappApplication.class, args);
    }
}
现在,我们可以创建一个可执行的 JAR 文件,并使用以下 Maven 或 Gradle 命令运行 Spring Boot 应用程序。
对于 Maven,使用下面给出的命令
$ mvn clean install
成功之后,我们可以在 target 目录下找到 JAR 文件。
对于 Gradle,使用下面给出的命令
$ gradle clean build
然后,在客户端服务应用程序中添加以下依赖项,并指出 Zipkin Server URL 以通过 Zipkin UI 跟踪微服务日志。
现在,在构建配置文件中添加 Spring Cloud Starter Zipkin 依赖项,如下所示
Maven 用户可以在 pom.xml 文件中添加如下依赖
<dependency>
   <groupId>org.springframework.cloud</groupId>
   <artifactId>spring-cloud-sleuth-zipkin</artifactId>
</dependency>
Gradle 用户可以在 build.gradle 文件中添加以下依赖项
compile('org.springframework.cloud:spring-cloud-sleuth-zipkin')
现在,在 Spring Boot 应用程序中添加 Always Sampler Bean 从而将日志导出到 Zipkin 服务器。】
@Bean
public AlwaysSampler defaultSampler() {
   return new AlwaysSampler();
}
如果添加 AlwaysSampler Bean ,则 Spring Sleuth Zipkin Export 选项会自动从 false 更改为 true。
接下来,在客户端服务 application.properties 文件中配置您的 Zipkin Server 基本 URL。
spring.zipkin.baseUrl = http://localhost:9411/zipkin/
然后,提供跟踪 ID 并在 Zipkin UI 中查找跟踪。
这里我们使用 IDEA 来启动服务(读者也可以使用上面两种方式中的一种生成可执行 jar 包)


