在 JavaScript 中创建自定义警告框
本文将介绍如何使用 jQuery UI、SweetAlert2 和自定义警报功能在 JavaScript 中创建自定义警报框。
使用 jQuery UI 创建自定义警告框
我们可以使用 jQuery UI 来模仿 JavaScript 本机 alert() 函数的功能。 尽管 jQuery UI 有很多 API,您可以使用它的 dialog() API 来创建自定义警告框。
同时,与原生 JavaScript 原生的 alert() 函数不同,您可以拖动使用 dialog() API 创建的警告框。
我们在以下代码块中将 jQuery、jQuery UI 和 jQuery UI 的 CSS 样式导入到我们的代码中。 因此,我们可以使用 dialog() API 来创建自定义警告框。
同时,dialog() API 需要网页上的一个位置来显示自定义警告框。 因此,我们将使用具有唯一 ID 的 HTML div 元素。
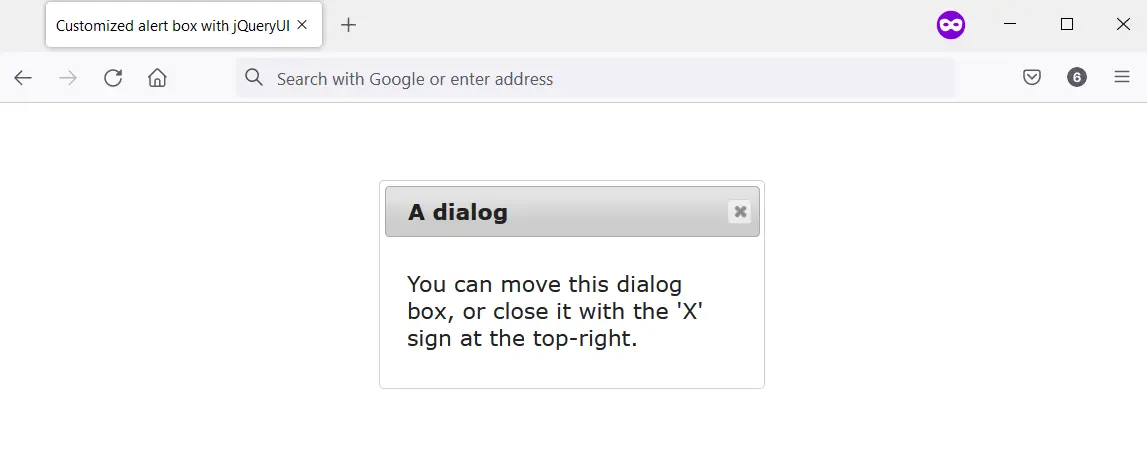
更重要的是,这个 div 应该有一个 title 属性,其中包含将成为自定义警告框标题的文本。 当您在 Web 浏览器中运行代码时,您会看到使用 dialog() API 创建的自定义警告框。
代码:
<head>
    <meta charset="utf-8">
    <title>Customized alert box with jQueryUI</title>
    <link rel="stylesheet" href="https://ajax.googleapis.com/ajax/libs/jqueryui/1.12.1/themes/smoothness/jquery-ui.css">
    <script src="https://ajax.googleapis.com/ajax/libs/jquery/3.6.0/jquery.min.js"></script>
    <script src="https://ajax.googleapis.com/ajax/libs/jqueryui/1.12.1/jquery-ui.min.js"></script>
    <script>
        $(function() {
            $("#jquery-ui-dialog").dialog();
        });
    </script>
</head>
<body>
    <main style="display: flex; justify-content: center;">
        <div id="jquery-ui-dialog" title="A dialog">
            <p>You can move this dialog box, or close it with the 'X' sign at the top-right.</p>
        </div>
    </main>
</body>
输出:
使用 SweetAlert2 创建自定义警报框
SweetAlert2 允许您创建一个可访问、可自定义且响应迅速的警报框。 它旨在取代 JavaScript 弹出框,包括原生 JavaScript alert() 函数。
您可以在项目中以多种方式使用 SweetAlert2。 但是,对于本文,我们将通过内容分发网络 (CDN) 将其与 <script> 标记一起使用。
因此,当 SweetAlert2 下载时,您可以通过将事件侦听器附加到 HTML 按钮来使用它。 您可以调用 Swal.fire() 方法并在事件侦听器中为其提供参数。
您提供给 Swal.fire() 的参数决定了自定义警报框的输出。
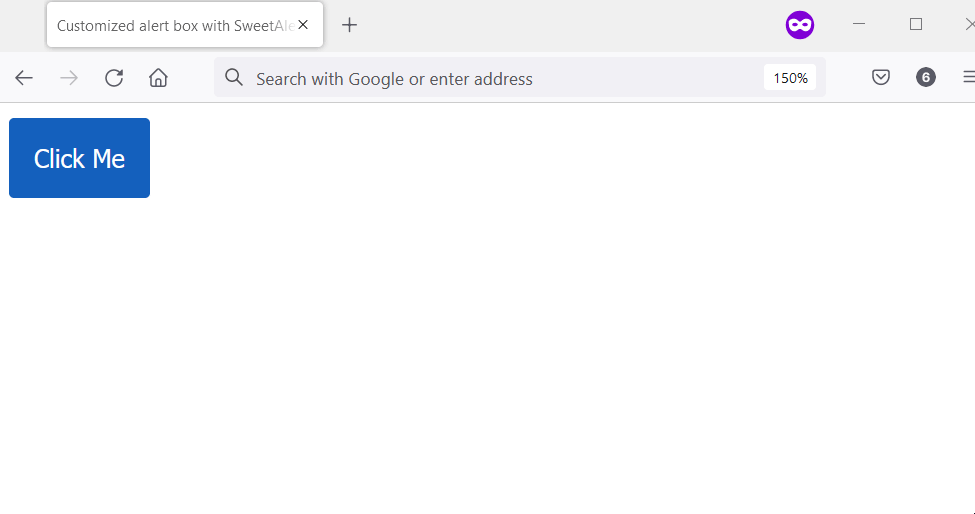
我们在下一个代码块中将事件侦听器附加到 HTML 按钮。 此按钮的 HTML ID 属性为#showAlert。
我们使用 jQuery 来抓取 ID 来让事情变得简单。 之后,我们使用显示自定义警报的参数调用 Swal.fire() 方法。
代码:
<head>
    <meta charset="utf-8">
    <title>Customized alert box with SweetAlert2</title>
    <script src="https://ajax.googleapis.com/ajax/libs/jquery/3.6.0/jquery.min.js"></script>
    <script src="https://cdn.jsdelivr.net/npm/sweetalert2@11.4.8/dist/sweetalert2.all.min.js"></script>
    <style type="text/css">
        button {
            padding: 1em;
            background-color: #1560bd;
            color: #ffffff;
            border-radius: 0.2em;
            border-style: none;
            cursor: pointer;
        }
    </style>
</head>
<body>
    <main>
        <button id="showAlert">Click Me</button>
    </main>
</body>
<script>
    $("#showAlert").click(function(){
        Swal.fire(
            'Are you done?',
        )
    });
</script>
输出:
使用自定义函数创建自定义警报框
您可以创建一个自定义函数来替换用户 Web 浏览器中的本机 alert() 框。 您将从 window 对象执行此操作,自定义函数将按如下方式工作:
- 为警报标题和警报按钮文本设置常量。
- 检查 HTML 是否具有 alert_container 的 ID。 如果为真,则停止创建自定义警报。
- 为警报容器创建 div 元素并将其附加到 body 元素。 之后,执行以下操作:
- 为警报容器提供一个 HTML ID。
- 为警报容器提供一个 HTML 类名。
- 为警告框创建一个 div 元素并将其附加到警告容器。 然后,给它一个 HTML 类名。
- 使用 scrollTop 设置警告框的顶部位置。
- 使用 scrollWidth 和 offsetWidth 设置警告框的左侧位置。
- 为警报标题创建一个 HTML h1 元素。 然后执行以下操作:
- 为警报标题创建一个文本节点。 它的值应该是警报标题常量。
- 将 h1 附加到警告框。
- 将文本节点附加到警报标题。
- 创建 HTML 按钮元素。 然后执行以下操作:
- 为按钮文本创建一个文本节点。 它的值应该是警报标题常量。
- 将按钮文本附加到按钮元素。
- 将按钮元素附加到警告框。
- 为按钮元素分配一个唯一的类名。
- 将事件侦听器附加到按钮。 事件侦听器应关闭自定义警报框。
此外,您应该创建一个函数来删除自定义警报。 这应该在用户单击“OK”按钮时发生。
该函数应使用以下步骤:
- 获取 HTML 正文元素。
- 获取警报容器。
- 使用 removeChild 方法从 HTML 正文元素中删除警报容器。
最后,创建 CSS 样式来设置自定义警报功能的样式。 在后续代码块中,您将找到以下内容的实现:
- 自定义警报功能
- 删除它的功能
- 自定义警报功能的 CSS 样式
HTML 和 JavaScript 代码:
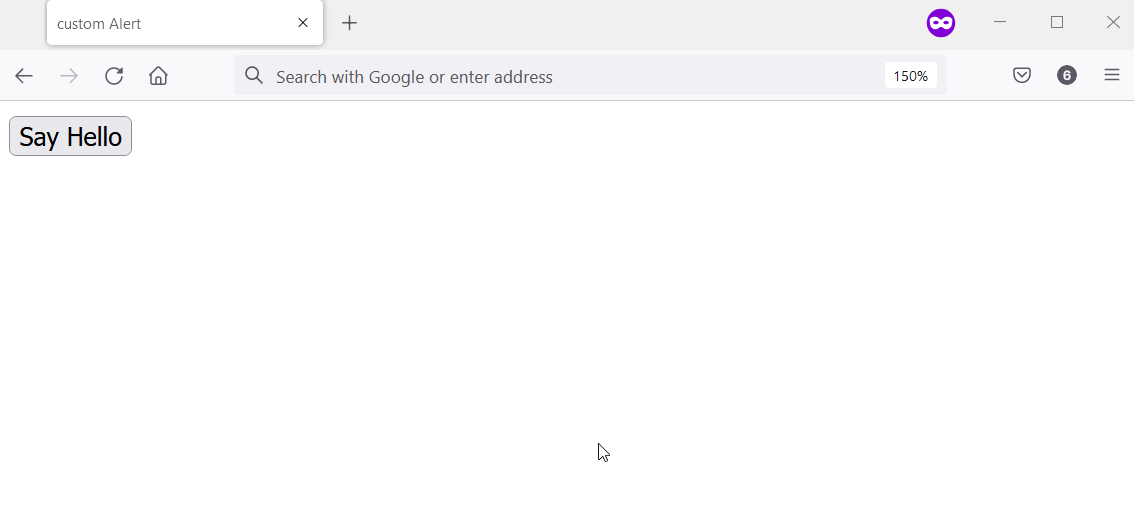
<body>
    <input type="button" value = "Say Hello" onclick="alert('Hello');" />
</body>
<script>
    // Ensure the user's web browser can run
    // JavaScript before creating the custom
    // alert box
    if (document.getElementById) {
        // Swap the native alert for the custom
        // alert
        window.alert = function (alert_message) {
            custom_alert(alert_message);
        }
    }

    function custom_alert(alert_message) {

        /* You can utilize the web page address
         * for the alert message by doing the following:

         const ALERT_TITLE = "The page at " + document.location.href + " says: ";
         */
        const ALERT_TITLE = "Alert Message";
        const ALERT_BUTTON_TEXT = "OK";

        // Check if there is an HTML element with
        // an ID of "alert_container".If true, abort
        // the creation of the custom alert.
        let is_alert_container_exist = document.getElementById("alert_container");
        if (is_alert_container_exist) {
            return;
        }

        // Create a div to serve as the alert
        // container. Afterward, attach it to the body
        // element.
        let get_body_element = document.querySelector("body");
        let div_for_alert_container = document.createElement("div");
        let alert_container = get_body_element.appendChild(div_for_alert_container);

        // Add an HTML ID and a class name for the
        // alert container
        alert_container.id = "alert_container";
        alert_container.className = "alert_container"

        // Create the div for the alert_box and attach
        // it to the alert container.
        let div_for_alert_box = document.createElement("div")
        let alert_box = alert_container.appendChild(div_for_alert_box);
        alert_box.className = "alert_box";

        // Set the position of the alert box using
        // scrollTop, scrollWidth, and offsetWidth
        alert_box.style.top = document.documentElement.scrollTop + "px";
        alert_box.style.left = (document.documentElement.scrollWidth - alert_box.offsetWidth) / 2 + "px";

        // Create h1 to hold the alert title
        let alert_header_tag = document.createElement("h1");
        let alert_title_text = document.createTextNode(ALERT_TITLE)
        let alert_title= alert_box.appendChild(alert_header_tag);
        alert_title.appendChild(alert_title_text);

        // Create a paragraph element to hold the
        // alert message
        let alert_paragraph_tag = document.createElement("p");
        let alert_message_container = alert_box.appendChild(alert_paragraph_tag);
        alert_message_container.textContent = alert_message;

        // Create the OK button
        let ok_button_tag = document.createElement("button");
        let ok_button_text = document.createTextNode(ALERT_BUTTON_TEXT)
        let ok_button = alert_box.appendChild(ok_button_tag);
        ok_button.className = "close_btn";
        ok_button.appendChild(ok_button_text);

        // Add an event listener that'll close the
        // custom alert
        ok_button.addEventListener("click", function () {
            remove_custom_alert();
        }, false);
    }

    function remove_custom_alert() {
        let HTML_body = document.querySelector("body");
        let alert_container = document.getElementById("alert_container");
        HTML_body.removeChild(alert_container);
    }
</script>
CSS 代码:
.alert_container {
    position: absolute;
    top: 0px;
    left: 0px;
    width: 100%;
    height: 100%;
    background-color: #0000004d;
}

.alert_box {
    position: relative;
    width: 300px;
    min-height: 100px;
    margin-top: 50px;
    border: 1px solid #666;
    background-color: #fff;
}

.alert_box h1 {
    font-size: 0.9em;
    margin: 0;
    background-color: #1560bd;
    color: #fff;
    border-bottom: 1px solid #000;
    padding: 2px 0 2px 5px;
}

.alert_box p {
    font-size: 0.7em;
    height: 50px;
    margin-left: 55px;
    padding-left: 5px;
}

.close_btn {
    width: 70px;
    font-size: 0.7em;
    display: block;
    margin: 5px auto;
    padding: 7px;
    border: 0;
    color: #fff;
    background-color: #1560bd;
    border-radius: 3px;
    cursor: pointer;
}
输出:
相关文章
Do you understand JavaScript closures?
发布时间:2025/02/21 浏览次数:108 分类:JavaScript
-
The function of a closure can be inferred from its name, suggesting that it is related to the concept of scope. A closure itself is a core concept in JavaScript, and being a core concept, it is naturally also a difficult one.
Do you know about the hidden traps in variables in JavaScript?
发布时间:2025/02/21 浏览次数:178 分类:JavaScript
-
Whether you're just starting to learn JavaScript or have been using it for a long time, I believe you'll encounter some traps related to JavaScript variable scope. The goal is to identify these traps before you fall into them, in order to av
How much do you know about the Prototype Chain?
发布时间:2025/02/21 浏览次数:150 分类:JavaScript
-
The prototype chain can be considered one of the core features of JavaScript, and certainly one of its more challenging aspects. If you've learned other object-oriented programming languages, you may find it somewhat confusing when you start
用 jQuery 检查复选框是否被选中
发布时间:2024/03/24 浏览次数:102 分类:JavaScript
-
在本教程中学习 jQuery 检查复选框是否被选中的所有很酷的方法。我们展示了使用直接 DOM 操作、提取 JavaScript 属性的 jQuery 方法以及使用 jQuery 选择器的不同方法。你还将找到许多有用的
jQuery 中的 Window.onload 与 $(document).ready
发布时间:2024/03/24 浏览次数:180 分类:JavaScript
-
本教程演示了如何在 jQuery 中使用 Window.onload 和 $(document).ready 事件。