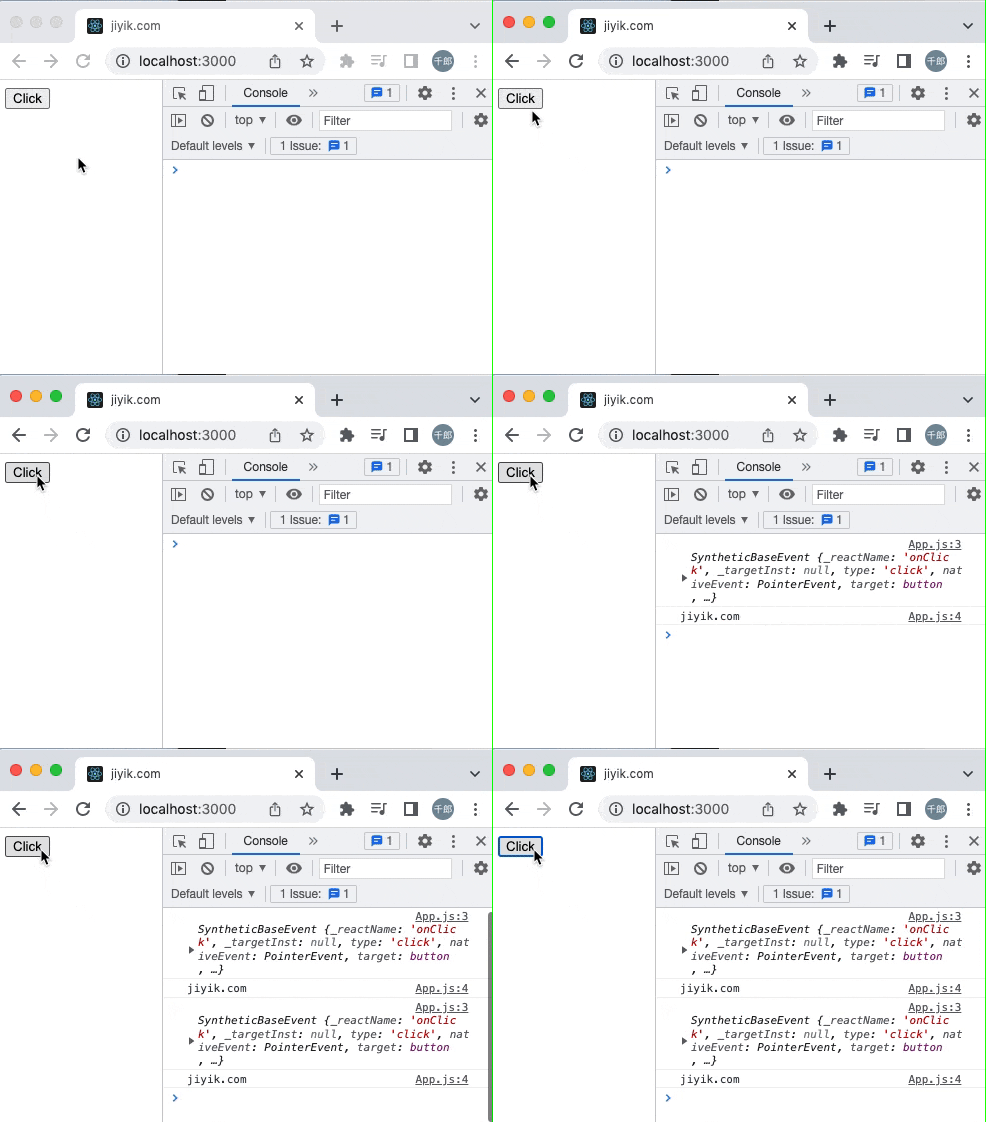
Passing events and parameters to onClick in React
Passing events and parameters to onClick in React:
-
Pass an inline function to the element's
onClickattribute. -
This function should get the event object and
handleClickcall -
Pass the event and arguments to
handleClick.
const App = () => {
  const handleClick = (event, param) => {
    console.log(event);
    console.log(param);
  };

  return (
    <div>
      <button onClick={event => handleClick(event, 'jiyik.com')}>
        Click
      </button>
    </div>
  );
};

export default App;

We set the attribute on the button element onClickto an inline arrow function.
<button onClick={event => handleClick(event, 'jiyik.com')}>
  Click
</button>
The arrow function takes the event object and calls handleClickthe function, passing the event and arguments to it.
const handleClick = (event, param) => {
  console.log(event);
  console.log(param);
};
We can use this method to pass as many parameters as we want to our event handler function.
请注意, we are passing a function toonClickthe property, rather than the result of calling a function.
<button onClick={event => handleClick(event, 'jiyik.com')}>
  Click
</button>
If the function is called when passed to onClickthe prop, for example onClick={handleClick()}, it will be called immediately when the component mounts.
When a function is passed to onClickthe property, it will only be called when the event is triggered.
Event handling functions are always passed the event object as the first argument.
We can pass additional arguments to the function after the event object.
Use functions that return functions to pass parameters
We can also define a function that takes one or more arguments and returns a function that accepts an event object.
const App = () => {
  const handleClick = param => event => {
    console.log(event);
    console.log(param);
  };

  return (
    <div>
      <button onClick={handleClick('jiyik.com')}>
        Click
      </button>
    </div>
  );
};

export default App;
handleClickThe function takes an argument parameter and returns a function that takes an event parameter.
The result of calling handleClickthe function is another function that takes the event object as an argument.
<button onClick={handleClick('jiyik.com')}>
  Click
</button>
The onClick property is still set to a function, so everything works just like in the previous code example.
Use data attributes to pass events and parameters onClick
We can also set the attribute on the element data-*to pass parameters in the onClick event handler.
const App = () => {
  const handleClick = event => {
    console.log(event);

    const example =
      event.currentTarget.getAttribute('data-example');
    console.log(example);
  };

  return (
    <div>
      <button data-example="jiyik.com" onClick={handleClick}>
        Click
      </button>
    </div>
  );
};

export default App;
We set the data-sample property on the button element and getAttribute()access it using the method.
<button data-example="jiyik.com" onClick={handleClick}>
  Click
</button>
The property can be named anything, such as data-baror data-foo.
We can currentTargetaccess this element through the event object's property.
const handleClick = event => {
  console.log(event);

  const example =
    event.currentTarget.getAttribute('data-example');
  console.log(example); // 👉️ jiyik.com
};
The event's currentTargetproperty gives us access to the element to which the event listener is attached.
The target property of the event gives us a reference to the element (possibly a descendant) that triggered the event.
data-*We can set multiple attributes on an element and getAttribute()access them using the method.
Element.getAttributeThe method returns the value of a given attribute on an element.
For reprinting, please send an email to 1244347461@qq.com for approval. After obtaining the author's consent, kindly include the source as a link.
Related Articles
Using onclick to execute a PHP function
Publish Date:2025/04/13 Views:155 Category:PHP
-
We will also introduce another onclick() method of executing PHP functions through events using the jQuery library. This method calls a JavaScript function that will output the content of the PHP function in the web page. We will also demon
How to avoid cross-origin (CORS) issues in React/Next.js
Publish Date:2025/03/17 Views:170 Category:NETWORK
-
In this article, we will introduce how to avoid cross-origin (CORS) issues in React/Next.js. Cross-origin resource sharing (CORS) is a protocol that defines how web requests should be handled when crossing different URLs.
React Tutorial - Transferring Props
Publish Date:2025/03/16 Views:188 Category:React
-
React transfers Props. Props are generated when components are encapsulated. Components expose some properties (Props) to the outside world to complete some functions.
React Tutorial: Props Anti-Pattern
Publish Date:2025/03/16 Views:187 Category:React
-
React's Props anti-pattern, using Props to generate state in getInitialState is an anti-pattern - Anti-Pattern.
React Tutorial - Props Validation
Publish Date:2025/03/16 Views:102 Category:React
-
Props validation is a very useful way to use components correctly. It can avoid many bugs and problems as your application becomes more and more complex. In addition, it can make your program more readable.
React tutorial: Types of Props for child components
Publish Date:2025/03/16 Views:172 Category:React
-
Usually, the child components of a React component are a group, that is, the child components are an array. Introduction to Type of the Children Props.
How to solve the error Uncaught TypeError: Cannot read properties of undefined in
Publish Date:2025/03/16 Views:153 Category:React
-
In the process of React development, we often encounter some errors. Here we look at an error reported in App.js. The error is as follows: App.js:69 Uncaught TypeError: Cannot read properties of undefined (reading 'setState') at onInput
Why do you need to bind event handlers in React Class Components?
Publish Date:2025/03/16 Views:60 Category:React
-
When using React, we must have come across control components and event handlers. We need to use `.bind()` in the constructor of the custom component to bind these methods to the component instance. As shown in the following code:
Solution to the error "does not contain a default export" in React
Publish Date:2025/03/16 Views:191 Category:React
-
When we try to use `default import` to import from a module that does not have a `default export`, we get a "does not contain a default export" error. To fix the error, make sure the module has named exports and wrap the import in curly braces, e.g.

